HTML sitemaps provide visitors with a bird’s-eye view of a website. I use one on my 404 error page to help users assist users in finding content. In this tutorial, I’ll explain how to add a HTML sitemap to an Umbraco 7 project.
- In Umbraco back office, click on the
Developermenu item. - Hover over
Partial View Macro Filesfolder and click the ellipsis followed byCreate. - Name the file
SitemapPartialMacro, leave checkbox to create a macro checked, and clickCreate. - Add the code below to the
Templatefield.
@inherits Umbraco.Web.Macros.PartialViewMacroPage
@_ Render the sitemap by passing the root node to the traverse helper _@

<div class="sitemap">
 <ul>
 <li>
 <a href="/">Home</a>
 </li>
 </ul>
 @Traverse(CurrentPage.AncestorOrSelf(1))
</div>
@* Helper method to travers through all descendants *@
@helper Traverse(IPublishedContent node)
{
 @* Update the level to reflect how deep you want the sitemap to go *@
 var maxLevelForSitemap = 4;
@* Select visible children *@
 var items = node.Children
 .Where("Visible")
 .Where("hideFromSitemap != true")
 .Where("Level <= " + maxLevelForSitemap);
@* If any items are returned, render a list *@
 if (items.Count() > 0)
 {
 <ul>
 @foreach (var item in items)
 {
 <li>
 <a href="@item.Url">@item.Name</a>
 @* Run the traverse helper again *@
 @Traverse(item)
 </li>
 }
 </ul>
 }
}- Remaining in the
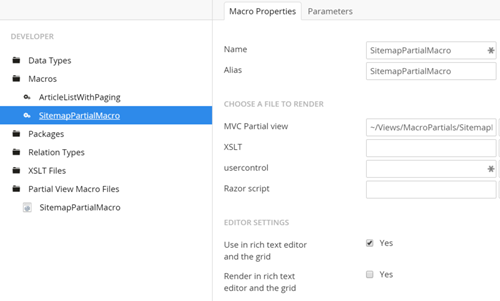
Developermenu, expand theMacrosfolder and click on the macro we created. - Under the
EDITOR SETTINGSproperties heading, select the check box to use in the rich text editor. ClickSave.
- Under the
Settingsmain menu item, expandDocument Typesand hover over your master document type clicking the ellipsis. - Click
Create, name itTextPage, leave the checkbox to create a template checked, and clickCreate. - On the
Propertiestab, add a rich text editor property with the aliasmessage.

- Open your master document type and add a
True/Falseproperty with the alias hideFromSitemap. - Open your home page document type, select the
Structuretab and selectTextPageas an allowable child node. - Remaining in the
Settingsmenu, expand theTemplatesfolder, and select theTextPagetemplate we created in a previous step. - Paste the code below into the template, being sure to change the
Layoutfield to match the name of your layout template.
@inherits Umbraco.Web.Mvc.UmbracoTemplatePage
@{
Layout = "\_Layout.cshtml";
}

<header>
 <div class="row">
 <div class="large-12 columns">
 <h1>
 @Umbraco.Field("headline")
 </h1>

@if (Model.Content.HasValue("tagline"))
{

 <h3>@Umbraco.Field("tagline")</h3>
 }
 </div>
 </div>
</header>

<div class="row">
 <div class="small-12">
 <section class="page-container">
 @Umbraco.Field("message")
 </section>
</div>
</div>- Under the
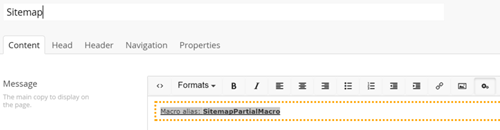
Contentmain menu item, hover over your home page, click the ellipsis, and add aTextPage. - Name the page
Sitemap. - Navigate to the tab with your message property, in the rich text editor menu click the
Insert macroicon and selectSitemapPartialViewMacro.
- Select the
True/Falseproperty to exclude the sitemap page from the sitemap. - Click
Save and publish.